Understanding the ANSI, DIN, and JIS norms for pipe flanges is important for businesses that work with global piping systems. These flange standards set the minimum sizes that affect how well, how safely, and how compatibly piping connections work in a wide range of industry settings. Purchasing and engineering teams that know how to measure flanges can achieve seamless integration, cost-effective sourcing, and high operating reliability across industries ranging from chemical processing and manufacturing to oil and gas.
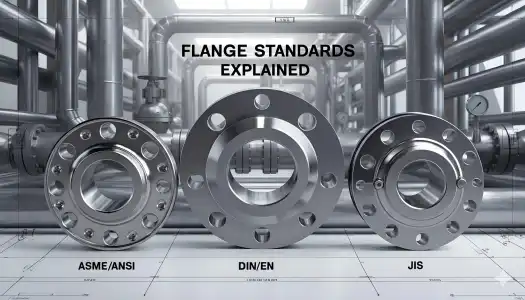
Understanding Pipe Flange Standards: ANSI, DIN, and JIS
The three main international flange standards came from different engineering styles in different parts of the world. Each one was made to meet the needs of different industries and ways of making things. Flange standards commonly referred to as ANSI are developed by the American Society of Mechanical Engineers (ASME) and accredited by the American National Standards Institute (ANSI), primarily serving the North American market. These standards stress strong pressure ratings and standard bolt patterns that work well in heavy industry settings.
Origins and Regulatory Frameworks
In the early 1900s, American businesses needed standard piping connections to build out their infrastructure. This is where the ASME B16.5 requirements originated. The standard focuses on pressure class ratings between 150 and 2500, which covers all the high-pressure uses that are popular in power plants and petrochemical plants. German engineering accuracy is shown by DIN (Deutsches Institut für Normung) standards, which focus on metric measurements and European ways of making things. The DIN EN 1092 standards work well with European pipe systems and provide PN (Nominal Pressure) grades that meet the needs of European businesses. JIS (Japanese Industrial Standards) changed over time to meet the needs of manufacturers in the Asia-Pacific region. They did this by adding design features that worked well with Japanese manufacturing methods. The JIS B2220 standards give K-class pressure ratings that are used in shipbuilding, chemical processing, and industrial manufacturing all over the Asia-Pacific area.
Critical Dimensional Parameters
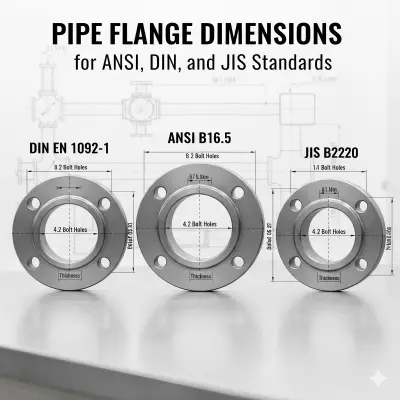
The most important measurements that people who work in buying need to know are nominal diameter ranges, bolt circle measurements, bolt hole configurations, flange thickness specifications, flange standards, and raised face dimensions. These parameters affect how well the connection works and how well the system interfaces with other components. When it comes to ANSI flanges, the number of bolt holes usually matches the nominal pipe size, and the standard spacing makes sure that assembly processes are always the same. DIN standards use metric bolt patterns with PN pressure class names, while JIS standards use K-class ratings and bolt patterns that are best for Asian production methods.
Dimensional Differences and Compatibility Between ANSI, DIN, and JIS Flanges
Differences in important dimensions between these standards make it hard for them to work together, which has an effect on both buying decisions and system design. By knowing these differences, engineering teams can predict problems with integration and come up with good answers.
Bolt Pattern Variations
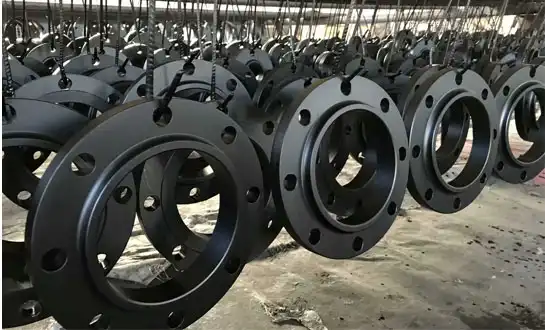
Standardised bolt hole counts for ANSI flanges range from 4 holes for smaller diameters to 32 holes for larger diameters. Bolt circle diameters are calculated using imperial measures. When it comes to bolt designs, DIN uses metric ones with hole counts that can be very different from ANSI ones, especially for middle-sized bolts. Japanese manufacturing preferences are often reflected in JIS bolt patterns. This makes the spacing needs unique and may not match up with either ANSI or DIN configurations. Different systems have to choose different gaskets, use different bolts, and put them together in different ways because of these differences.
Pressure Class Implications
Differences in pressure ratings between standards make it very hard to buy things. Even though they seem to be used for the same things, ANSI Class 150 flanges have different pressure limits than their DIN PN16 or JIS 10K counterparts. To make sure they are safe to use and follow the rules, these differences need to be carefully analysed by engineers. Actual life shows that flange standards that don't match can cause project delays, higher costs, and possibly safety issues. To get rid of compatibility problems, successful integration strategies often use special adapter flanges or standardize the whole system.
Key Procurement Considerations for Pipe Flanges per ANSI, DIN, and JIS Standards
To do great procurement, you need to pay close attention to processes like quality assurance, source evaluation, flange standards, and making sure that certifications are followed. These things to think about make sure that you get the flanges you need reliably while reducing project risks and cost overruns.
Essential Certification Requirements
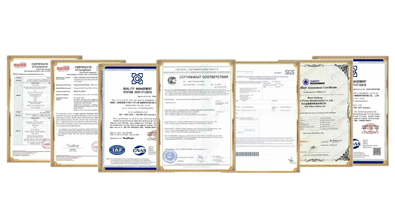
Certifications from the industry show that the flange is of good quality and meets all the standards that apply. Compliance with ASME B16.5 ensures that the flange meets the applicable ANSI-accredited dimensional and pressure requirements, and CE marking indicates compliance with applicable European Union directives, such as the Pressure Equipment Directive (PED), often in conjunction with harmonized standards like DIN EN 1092 for use in Europe. Compliance with JIS standards demonstrates adherence to Japanese quality and industry requirements. Many procurement teams need extra quality security, and third-party inspection services like SGS verification and Lloyd's Register certification can give it to them. Material test certificates (MTCs) provide full documentation for tracking, which is important for important uses and following the rules.
Specification Accuracy and Documentation
For accurate specification, you need to have precise dimensional drawings, material certifications, and proof of pressure ratings. To make sure the system works right, procurement teams have to check the bolt hole shapes, flange face types (raised face, flat face, or RTJ), and material grades. Modern CNC-machined sealing surfaces are more accurate in terms of size than older ways of production, so they work reliably in high-pressure situations. Hot-dip galvanising choices keep the dimensions of the metal while extending its useful life in corrosive environments.
Integrating Flange Dimension Knowledge into Engineering and Design
Engineering excellence requires a comprehensive understanding of how flange standards and dimensions interact with system design parameters, material selection, and operational requirements. This knowledge enables optimized system performance and enhanced reliability.
Design Optimization Strategies
Pressure class selection must align with system operating conditions while providing appropriate safety margins. ANSI Class 300 flanges offer substantial pressure capacity for demanding applications, while DIN PN25 specifications provide equivalent performance in metric systems. Material thickness specifications directly impact welding procedures and joint integrity. Proper welding allowances ensure strong connections that maintain dimensional accuracy throughout fabrication and installation processes.
Performance Enhancement Techniques
Raised face (RF) configurations provide excellent sealing performance with standard gaskets, while ring-type joint (RTJ) designs offer superior pressure containment for extreme conditions. Flat face (FF) flanges accommodate cast iron components and low-pressure applications effectively. Integration of precise dimensional data throughout design phases reduces maintenance requirements and extends the system lifecycle. Proper flange selection minimizes stress concentrations while ensuring reliable operation across diverse industrial environments.
Conclusion
When buying and engineering teams know how to measure pipe flanges according to ANSI, DIN, and JIS standards, they can make decisions that improve system performance and project success. Understanding differences in dimensions, problems with compatibility, and certification standards helps you evaluate suppliers well and make sure your specifications are correct. When flange dimension information is properly incorporated into the design process, system reliability is improved while lifecycle costs and maintenance needs are decreased. RAYOUNG's complete flange solutions offer the quality, certification, flange standards, and exact measurements needed for commercial uses all over the world to be successful.
FAQ
Q1: How do ANSI, DIN, and JIS flange dimensions differ in bolt hole patterns?
A: ANSI flanges use standardized bolt hole counts that correlate with nominal pipe sizes, typically featuring imperial measurements. DIN specifications employ metric bolt patterns with different hole counts and spacing, while JIS standards utilize unique configurations optimized for Japanese manufacturing practices. These differences affect interchangeability and require careful verification during procurement.
Q2: Can ANSI and DIN flanges be used interchangeably in piping systems?
A: ANSI and DIN flanges are generally not directly interchangeable due to differences in bolt circle diameters, bolt hole counts, and thickness specifications. Direct substitution can compromise sealing efficiency and safety unless properly engineered with appropriate adapters or modifications.
Q3: What certifications should I request from flange suppliers to ensure standards compliance?
A: Request documentation demonstrating compliance with ASME B16.5 for ANSI flanges, CE marking for DIN compliance, and JIS certification for Japanese standards. Additional third-party certifications from SGS, Lloyd's Register, or equivalent inspection services provide extra quality assurance. Always verify material test certificates and dimensional inspection reports.
Partner with RAYOUNG for Superior Flange Standards Manufacturing
RAYOUNG delivers precision-engineered flange standards that meet exacting ANSI, DIN, and JIS specifications for demanding industrial applications. Our CNC-machined sealing surfaces, complete MTC traceability, and hot-dip galvanizing options ensure superior performance and compliance across global markets. Experience the reliability that makes us a trusted flange standards supplier for procurement professionals worldwide. Contact us at info@hb-steel.com to discuss your specific requirements and receive expert guidance on optimal flange selection for your projects.
References
1. American Society of Mechanical Engineers. "ASME B16.5: Pipe Flanges and Flanged Fittings." New York: ASME Press, 2020.
2. Deutsches Institut für Normung. "DIN EN 1092-1: Flanges and their Joints - Circular Flanges for Pipes, Valves, Fittings and Accessories." Berlin: DIN Standards, 2018.
3. Japanese Standards Association. "JIS B2220: Steel Pipe Flanges." Tokyo: Japanese Standards Association, 2019.
4. Nayyar, Mohinder L. "Piping Handbook, Eighth Edition." New York: McGraw-Hill Education, 2019.
5. American Petroleum Institute. "API 6A: Specification for Wellhead and Christmas Tree Equipment." Washington: API Publishing Services, 2021.
6. International Organization for Standardization. "ISO 7005-1: Metallic Flanges - Steel Flanges." Geneva: ISO Central Secretariat, 2017.

