Measuring steel pipe flange bolt patterns accurately determines the success of industrial connections across multiple sectors. The flange bolt pattern serves as the fundamental specification that ensures proper alignment, secure fastening, and operational safety in piping systems. Accurate measurements prevent costly mismatches, project delays, and potential safety hazards. Understanding these measurements becomes essential when sourcing components for EPC contractors, distributors, engineering firms, and industrial facilities requiring reliable pipe connections that meet stringent performance standards.
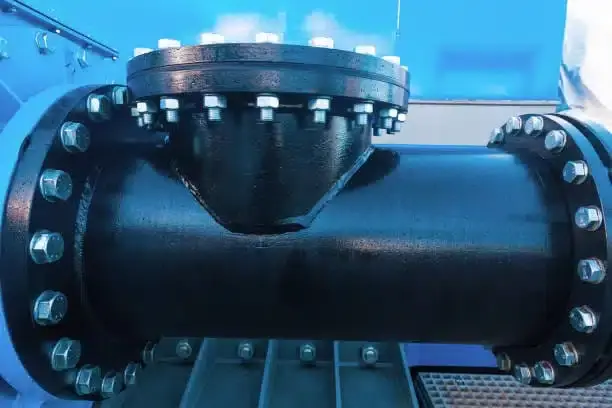
Understanding Flange Bolt Patterns and Their Importance
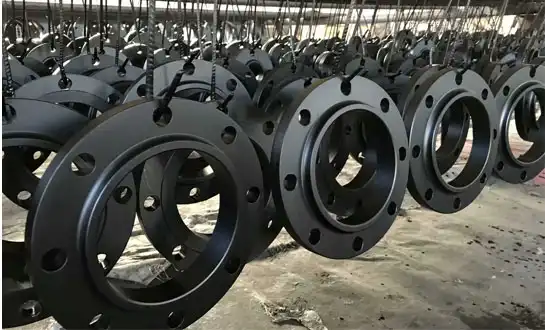
The exact placement and size requirements of the bolt holes around the outside of steel pipe flanges are defined by flange bolt designs. The bolt circle diameter and the overall bolt pattern describe different aspects of the flange geometry, but both measurements are needed to ensure proper fit and alignment. The bolt pattern includes several important measurements, such as the number of bolt holes, their diameter, the distance between holes, and the pitch circle diameter, which decides how the bolts are arranged overall.
Key Dimensions in Flange Bolt Patterns
Knowing these important measurements helps procurement workers make smart choices about how well parts will work together. Each dimension has a specific job to do to make sure that connections are safe, reliable, and able to handle operating pressures and environmental conditions. Based on the size of the flange and the required pressure grade, the number of bolt holes changes. Smaller diameter flanges usually have four to eight holes for bolts, while bigger industrial flanges may have twelve, sixteen, or more holes to spread the stress across the connection more evenly. The bolt hole diameter needs to be big enough to fit the bolt size needed for the job. Standard sizes range from 5/8 inch to 1.5 inch, based on the service conditions and rating of the flange. The pitch circle diameter is the diameter of the made-up circle that goes through the middle of all the bolt holes. This measurement is very important for making sure that the bolts are lined up correctly during assembly. Flange standards, such as ANSI B16.5, DIN EN 1092-1, and JIS B2220, have tables that show how pitch circle diameters are related to nominal pipe sizes and pressure classes.
Industry Standards and Compliance Requirements
There are different regional and international rules for flange bolt patterns, so it is important for global procurement processes to check for compliance. In North America, most markets use ANSI standards, while in Europe, most use DIN standards. JIS standards are used a lot in Asian markets, particularly in Japanese manufacturing, while other countries apply their own national standards. These guidelines make sure that parts from different companies manufactured to the same standard can be used together without any problems, and they also keep the safety margins needed for high-pressure applications. Teams in charge of buying things have to make sure that the flanges they choose meet the standards that are needed for their uses and locations.
Step-by-Step Guide to Measuring Steel Pipe Flange Bolt Patterns
For accurate measurements and consistent results, you need the right tools and a methodical approach. Precision callipers, measuring tapes, and bolt circle gauges made just for flange readings are all types of professional measuring tools. For bolt hole diameters, digital callipers are the most accurate tool. For bigger pitch circle diameters, flange bolt pattern flexible measuring tapes work well.
Measuring Even Number Bolt Holes
When there are an even number of bolt holes in a flange, measuring is easier because the holes line up straight across from each other. To find the pitch circle diameter, find the centre-to-centre distance between two bolt holes that are directly opposite each other. This centre-to-centre distance equals the pitch circle diameter. Find the two bolt holes that are right across from each other to start. Find out how far apart the centres of these holes are by using callipers or a measuring tape. Write down this number as the initial pitch circle width. To make sure the results are the same across the flange, measure more sets of holes that are opposite each other to make sure they are accurate. To find the diameter of a bolt hole, put callipers into each hole and write down the internal diameter. Measure more than one hole to make sure they are all the same size, since differences in manufacturing can cause holes to be different sizes. Record the smallest width that was measured to make sure that the bolts you choose will fit all the holes correctly.
Measuring Odd-Number Bolt Holes
When the number of bolts is odd, you need to use trigonometry to figure out the patterns because the holes don't line up exactly opposite each other. The most accurate way to find the pitch circle diameter is to measure from the centre of one bolt hole to the centre of the flange and then double that number. Find the geometric center of the flange by measuring and marking the centerpoint of the flange's general diameter. Find out how far this centre is from the centre of any bolt hole. To find the pitch circle diameter, multiply this radius number by two. Check the accuracy by measuring from the centre to other bolt holes and making sure the results are always the same. You could also use algebraic formulas based on the number of holes and measure the chord distance between holes that are next to each other. For procurement verification reasons, however, the radius method is commonly used in the field and provides acceptable accuracy when performed carefully.
Common Flange Bolt Pattern Types and Their Applications
Different industries utilise specific bolt patterns optimised for their unique operational requirements. Understanding these variations helps procurement professionals select appropriate components for their specific applications while ensuring compatibility with existing infrastructure.
Industrial Piping Applications
Process industries, including chemical, petrochemical, and power generation facilities, typically employ ANSI Class 150, 300, 600, and higher pressure ratings. These applications require robust bolt patterns capable of maintaining seal integrity under extreme pressure and temperature conditions. Slip-on flanges represent a popular choice for many industrial applications because they slide directly onto the pipe and connect without utilising additional tools for installation. The design of slip-on flanges allows direct and secure pipe connections that are suitable for low to medium pressure and temperature conditions when properly installed. These flanges feature standard bolt patterns that ensure compatibility with a wide range of industrial equipment. Water and wastewater treatment facilities often utilise different bolt patterns compared to hydrocarbon processing plants. Municipal applications may employ lower pressure ratings with correspondingly different bolt arrangements, while oil and gas facilities require higher strength patterns capable of containing volatile substances safely.
Regional Standard Variations
European installations typically follow DIN standard bolt patterns, flange bolt pattern which differ from ANSI specifications in both bolt circle diameters and bolt hole arrangements. These differences can create compatibility challenges when sourcing components internationally or retrofitting existing systems with new equipment. Asian markets present additional complexity with JIS standards prevalent in Japanese applications and various national standards used throughout other countries. Procurement teams must carefully verify standard compatibility when sourcing components across different regions to avoid costly mismatches during installation.
Procurement Insights: Sourcing Flange Bolt Pattern Components
Successful procurement strategies balance quality requirements with cost considerations while ensuring reliable supply chains capable of meeting project deadlines. Establishing relationships with qualified suppliers who understand international standards and maintain appropriate certifications reduces procurement risks and supports project success.
Quality Certifications and Standards Compliance
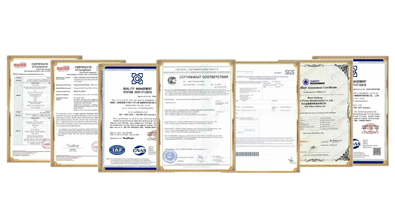
Reputable suppliers maintain certifications, including ISO 9001:2015 quality management systems, ASME code compliance, and material certifications from recognised testing laboratories. These certifications provide assurance that manufactured components meet specified dimensional tolerances and material properties required for safe operation. Material test certificates document chemical composition, mechanical properties, and dimensional verification for each production lot. Procurement teams should require these certificates for critical applications where component failure could result in safety hazards or significant operational disruptions. Third-party inspection services provide additional verification for high-value procurement contracts. Independent inspectors verify dimensional accuracy, surface finish quality, and material compliance before shipment, reducing the risk of receiving non-conforming components.
Supply Chain Considerations
Global supply chains require careful coordination to ensure timely delivery while maintaining quality standards. Lead times vary significantly between standard and custom bolt patterns, with standard configurations typically available within a week, while custom patterns may require several months for manufacture. Inventory management strategies should account for critical bolt pattern requirements and maintain appropriate stock levels for frequently used configurations. Emergency procurement procedures help address unexpected requirements while minimising project delays and cost impacts.
RAYOUNG: Your Trusted Partner for Industrial Pipe Fittings
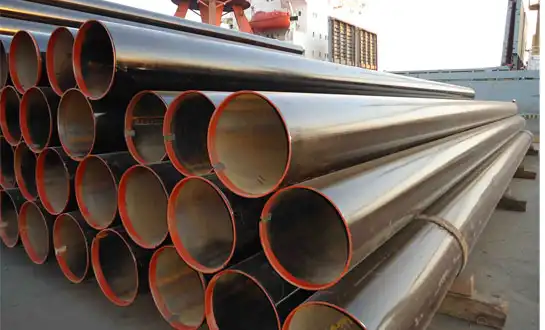
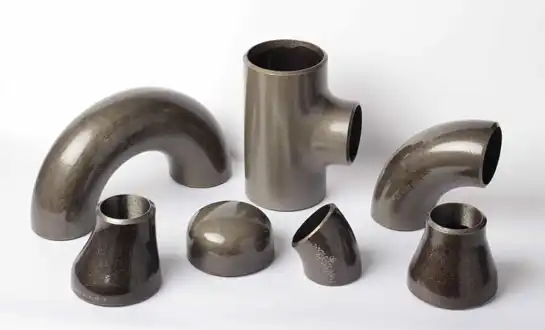
RAYOUNG has extensive experience manufacturing and supplying high-quality industrial pipe fittings that are made to fit a wide range of project needs in markets around the world. Buttweld steel elbows, steel reducers, and precision-engineered flanges are just a few of the many products we offer. They are all designed to meet the needs of demanding industrial uses. Our manufacturing skills allow us to meet all of your design needs, from simple straight-line connections to complicated angles and flexible joints that can handle vibration and temperature changes. RAYOUNG is known as a reliable supplier of carbon steel pipes in both domestic and foreign markets, always sending parts that meet strict quality and performance standards. Quality approvals like GOST-R and SGS show that we are serious about exporting legally and making sure the quality of our products. Our ISO 9001:2015 certification shows that we use systematic quality management methods to make sure that all of our manufacturing operations produce products that work the same way. Customers can trust that we will be able to offer reliable parts that fit their specific bolt pattern needs because of these certifications. Our steel pipe fittings and pipes offer great performance, safety features, and long-lasting durability, making them suitable for a wide range of uses, from home construction to industrial plants and business buildings. Our fittings offer accurate flow control and long-lasting service life, whether they are used to support gas transmission lines or water delivery systems.
Conclusion
Successful industrial procurement processes depend on the accurate measurement of steel pipe flange bolt patterns. Knowing how bolt hole arrangements, pitch circle diameters, and industry standards relate to each other helps procurement pros make smart choices that lower project risks and make sure that parts work together. This guide explains systematic ways to measure things that can be used to check flange standards for a variety of bolt pattern configurations. Accurate measurements, good relationships with suppliers, and the right certifications are all parts of successful buying strategies that deliver parts that meet project needs safely and affordably.
FAQ
Q1: How do I measure flange bolt patterns with damaged or partially obscured bolt holes?
A: When dealing with damaged flanges, measure the undamaged bolt holes to establish the pattern, then calculate missing hole positions using geometric principles. Use the known spacing between intact holes to determine the complete bolt circle diameter and hole locations. Cross-reference measurements with standard flange tables to verify accuracy and identify the correct flange specification.
Q2: What's the difference between bolt circle diameter and flange bolt pattern?
A: The bolt circle diameter represents a single measurement - the diameter of the imaginary circle passing through the centre of all bolt holes. The flange bolt pattern encompasses multiple specifications, including the bolt circle diameter, number of holes, hole diameter, and angular spacing between holes. The bolt pattern provides complete information needed for component compatibility verification.
Q3: Can I use flanges with slightly different bolt patterns in the same system?
A: Using flanges with different bolt patterns creates safety hazards and violates industry standards. Even small dimensional differences can prevent proper bolt engagement, reduce connection strength, and create leak paths. Always verify that all flanges in a system conform to the same standard and pressure rating to ensure safe and reliable operation.
Partner with RAYOUNG for Precision Flange Solutions
RAYOUNG stands ready to support your flange bolt pattern requirements with precision-engineered components that meet international standards and exceed performance expectations. Our technical expertise in flange manufacturing ensures accurate bolt patterns that provide reliable connections for your critical applications. As a leading flange bolt pattern supplier, we offer comprehensive consultation services to help you select the optimal components for your specific project requirements.
Our commitment to quality and customer satisfaction extends beyond product delivery to include technical support and application guidance. Contact our engineering team to discuss your project requirements and discover how our flange solutions can enhance your system reliability while reducing long-term maintenance costs. Reach out to us for detailed quotations and technical specifications by contacting us at info@hb-steel.com.
References
1. American Society of Mechanical Engineers. ASME B16.5-2020: Pipe Flanges and Flanged Fittings: NPS 1/2 through NPS 24 Metric/Inch Standard. New York: ASME Press, 2020.
2. Deutsches Institut für Normung. DIN EN 1092-1: Flanges and their joints - Circular flanges for pipes, valves, fittings and accessories, PN designated - Part 1: Steel flanges. Berlin: Beuth Verlag, 2018.
3. Japanese Industrial Standards Committee. JIS B 2220: Steel pipe flanges. Tokyo: Japanese Standards Association, 2019.
4. International Organisation for Standardisation. ISO 7005-1: Metallic flanges - Part 1: Steel flanges. Geneva: ISO Publications, 2011.
5. American Petroleum Institute. API 605: Large Diameter Carbon Steel Flanges. Washington: API Publishing Services, 2017.
6. British Standards Institution. BS EN 1759-1: Flanges and their joints - Circular flanges for pipes, valves, fittings and accessories, Class designated - Part 1: Steel flanges, NPS 1/2 to 24. London: BSI Standards Limited, 2015.

