In order to correctly measure a pipe flange, you need to know its outside diameter, bolt circle diameter, thickness, and bolt hole specifications. Making sure the measurements are right keeps operating safety standards high, avoids costly installation delays, and makes sure the system works with existing piping systems. Industrial workers use accurate flange measurements to find the right parts that meet ANSI, DIN, or JIS standards and have the right sealing and pressure ratings for each application.
Understanding Pipe Flange Basics Before Measurement
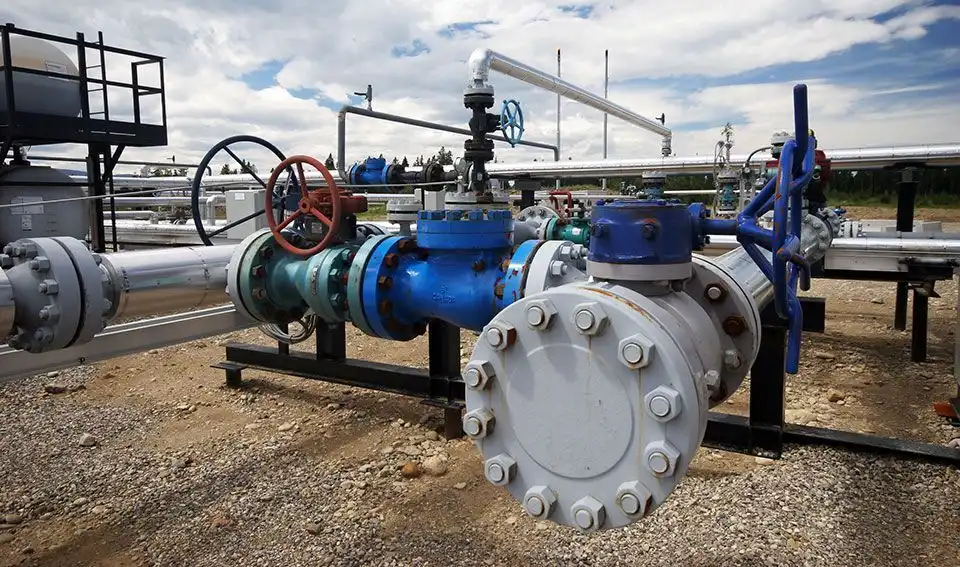
Before taking any readings, it's important to understand the basic ideas behind pipe flanges. In industrial plumbing systems, a pipe flange is a mechanical link that puts together pipes, valves, pumps, and other tools. These important parts make it easy to put together and take apart for repair, and they also make sure that connections don't leak under different pressures.
Types of Flanges and Their Applications
There are different flange designs that are used for different installation and operation needs. Weld neck flanges are very strong and work well in high-pressure situations. Slip-on flanges, on the other hand, are a cheaper option for low-pressure systems. For smaller pipes, threaded flanges work well instead of welding, and socket weld flanges have the best features of both welded and threaded joints.
Key Dimensional Parameters
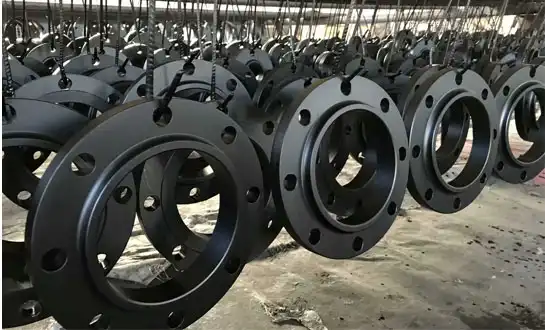
The Outside Diameter (OD) and Bolt Circle Diameter (BCD) are two important measurements. The OD determines the total size of the flange, and the BCD sets the location of the bolt holes. The flange thickness affects the structural strength, and the raised face diameter makes sure that the gasket fits properly. By understanding these factors, you can accurately match pipe flange specifications and avoid problems with compatibility during installation.
International Flange Standards
ANSI/ASME standards, which use inch-based measurements and particular pressure class names, are most common in North America. In European markets that use metric measures, DIN standards are most common. In Asian markets that have their own specific measurement needs, JIS standards are used. Each standard lists specific tolerances and facing types, such as RF (Raised Face), FF (Flat Face), and RTJ (Ring Type Joint). When these are correctly defined, they make sure that all products can be used anywhere in the world.
Step-By-Step Method to Measure a Pipe Flange Accurately
For accurate flange measurements, you need to use well-calibrated tools and tried-and-true methods. As part of proper planning, you should get the right measuring tools, like callipers, steel rulers, and flange gauges, and make sure the area around the installed equipment is safe for workers.
Essential Measuring Tools and Safety Preparation
Digital callipers are used for measuring small dimensions, large-diameter callipers are used for measuring outside diameters, and flange identification gauges are used for quick confirmation. Personal protective equipment is required by safety rules, especially when measuring flanges in high places or active systems.
Measuring Outside Diameter and Bolt Circle Diameter
To start, measure the outside diameter of the flange from edge to edge across the centre point, making sure the line of measurement goes through the centre of the flange. To find the bolt circle diameter, either measure from one bolt hole's centre to the other's centre, or use the formula: BCD = (centre-to-centre distance between neighbouring holes) ÷ sin(180°/number of holes).
Determining Thickness and Face Type
To account for differences in how the flange was made or how it wears, measure its width more than once around its circumference. Look at the shape of the sealing surface to figure out the face type. For example, raised face flanges have a raised circular area, flat face flanges have completely flat surfaces, and RTJ flanges have machined holes for metallic ring gaskets.
Documentation and Verification
Keep track of all the measurements you take, like the number of bolt holes, the diameter, and the distance between them. Compare the numbers to the relevant standards to make sure they are in line and find the right pipe flange specification. This process of checking makes sure that there are no mistakes in the procurement process and that the new parts will work with the old ones.
Common Challenges in Measuring Pipe Flanges and How to Avoid Them
Measurement accuracy can be compromised by various factors that lead to specification errors and costly mistakes. Recognising these challenges and implementing preventive measures ensures reliable results and successful procurement outcomes.
Dealing with Worn or Damaged Flanges
Corrosion, erosion, and mechanical damage can distort original flange dimensions, making accurate measurement challenging. Surface irregularities may prevent proper calliper contact, while pitting or scaling can obscure original machining marks. Clean the measuring surfaces thoroughly and take multiple measurements at different locations to establish accurate baseline dimensions.
Standard and Type Identification Issues
Confusion between different international standards often occurs in global procurement scenarios. ANSI flanges may appear similar to DIN flanges but feature different bolt patterns and pressure ratings. Always verify the original equipment specifications and maintain detailed documentation to prevent mismatched components during replacement or expansion projects.
Measurement Tool Calibration and Technique
Inaccurate or poorly maintained measuring instruments compromise measurement reliability. Digital callipers require regular calibration checks, while worn mechanical instruments may provide inconsistent readings. Establish standardised measurement procedures and train personnel in proper techniques to ensure consistent, reproducible results across different measurement sessions.
Practical Use Cases and Examples of Accurate Pipe Flange Measurement
Real-world applications demonstrate the critical importance of precise pipe flange measurements across various industrial sectors. These examples highlight how measurement accuracy directly impacts operational safety, cost control, and project success.
Chemical Processing Industry Applications
Chemical plants require exact flange measurements to ensure compatibility with corrosive media and high-temperature conditions. Stainless steel flanges with special alloy compositions demand precise dimensional verification to maintain seal integrity and prevent dangerous leaks. Material compatibility checks combined with accurate measurements prevent catastrophic failures in aggressive chemical environments.
High-Pressure Pipeline Systems
Oil and gas pipelines operating at extreme pressures rely on precisely measured flanges to maintain system integrity. Carbon steel flanges must meet exact dimensional specifications to ensure proper bolt loading and gasket compression. Measurement accuracy becomes critical when retrofitting existing systems or connecting new pipeline sections to established infrastructure.
Custom Manufacturing and OEM Applications
Original equipment manufacturers depend on detailed flange measurements to produce components meeting exact customer specifications. Custom applications often require non-standard dimensions or special materials, making accurate measurement essential for successful manufacturing. Dimensional verification during production ensures final products meet design requirements and perform reliably in service. RAYOUNG specialises in manufacturing precision flanges with CNC-machined sealing surfaces that meet stringent dimensional tolerances. Our products feature full MTC traceability and optional hot-dip galvanising for enhanced corrosion resistance, ensuring long-term performance in demanding industrial applications.
Conclusion
Correctly measuring pipe flanges is essential for industrial projects to go smoothly, as it makes sure that the right parts are chosen, that the fitting goes smoothly, and that operations are safe. To find the right flanges for a given application, procurement professionals need to know about dimensional parameters, follow systematic measurement processes, and be aware of common problems. Spending money on good measuring tools and high-quality parts will lower project costs, keep operations running smoothly, and keep the system reliable for the whole life of the equipment.
FAQ
Q1: What tools are essential for measuring pipe flange dimensions accurately?
A: Essential tools include digital callipers for precise measurements, steel rulers for general dimensions, and specialised flange gauges for quick identification. Large-diameter callipers are necessary for bigger flanges, while thread gauges help identify threaded connections. Always use calibrated instruments to ensure measurement accuracy and maintain consistent results across different measurement sessions.
Q2: How do I determine the bolt circle diameter when bolt holes are difficult to access?
A: When direct measurement is challenging, calculate bolt circle diameter using the formula: BCD = (centre-to-centre distance between adjacent holes) ÷ sin(180°/number of holes). Alternatively, measure from the flange centre to any bolt hole centre and multiply by two. This method works effectively even when only partial access to bolt holes is available.
Q3: What are the key differences between ANSI, DIN, and JIS flange measurements?
A: ANSI flanges use inch-based dimensions with specific pressure class designations (150#, 300#, 600#), while DIN flanges employ metric measurements with pressure ratings expressed in bars (PN10, PN16, PN25). JIS flanges feature unique bolt patterns and dimensional specifications that differ from both ANSI and DIN standards, requiring careful verification during international procurement activities.
Partner with RAYOUNG for Precision Pipe Flange Solutions
RAYOUNG stands as your trusted pipe flange supplier, delivering precision-engineered components that meet exact dimensional specifications for critical industrial applications. Our comprehensive product line includes ANSI, DIN, and JIS standard flanges featuring RF, FF, and RTJ facings, all manufactured with CNC-machined sealing surfaces and complete MTC traceability documentation. Whether you need standard configurations or custom solutions, our experienced team provides technical support throughout the selection process, ensuring optimal component matching for your specific requirements. Ready to streamline your procurement process with reliable, high-quality flanges? Contact us at info@hb-steel.com to discuss your project needs and receive detailed specifications tailored to your application requirements.
References
1. American Society of Mechanical Engineers. "ASME B16.5 - Pipe Flanges and Flanged Fittings: NPS 1/2 through NPS 24 Metric/Inch Standard." New York: ASME Press, 2020.
2. Deutsches Institut für Normung. "DIN EN 1092-1 - Flanges and their Joints - Circular Flanges for Pipes, Valves, Fittings and Accessories." Berlin: Beuth Verlag, 2018.
3. Japanese Industrial Standards Committee. "JIS B2220 - Steel Pipe Flanges." Tokyo: Japanese Standards Association, 2019.
4. Bickford, John H. "Gaskets and Gasketed Joints, Second Edition." Boca Raton: CRC Press, 2016.
5. Nayyar, Mohinder L. "Piping Handbook, Eighth Edition." New York: McGraw-Hill Education, 2019.
6. Singh, Karan. "Industrial Piping and Equipment Estimation Manual." Cambridge: Gulf Professional Publishing, 2017.

