A Step-by-Step Quality Inspection Plan for Butt Weld Pipe Fittings
Quality review speaks to the foundation of dependable pipeline frameworks, especially when managing with basic framework components. Butt Weld Fittings serve as fundamental association focuses in mechanical channeling systems, requesting thorough assessment conventions to guarantee operational security and life span. This comprehensive direct diagrams efficient review methods that ensure compliance with universal measures whereas keeping up the most elevated quality benchmarks. Through systematic appraisal strategies, engineers and quality control masters can recognize potential abandons some time recently establishment, avoiding expensive disappointments and guaranteeing ideal execution all through the benefit life of these vital components.
Pre-Installation Inspection Procedures
Visual Examination Standards
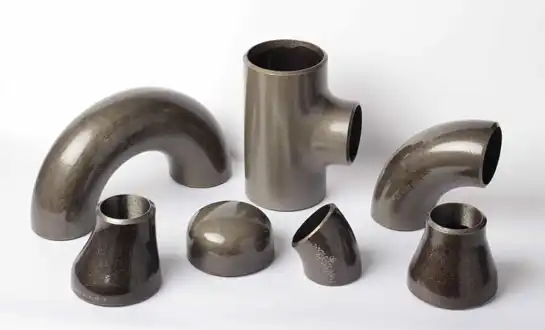
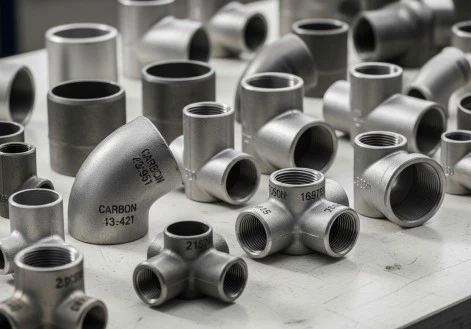
Visual inspection forms the foundation of quality assessment for Butt Weld Fittings, requiring trained personnel to identify surface irregularities, dimensional variations, and material defects. Inspectors have to look at the outside of the fitting for any cracks, laminations, or inclusions that could weaken its structure. As part of the examination process, the consistency of the wall thickness is checked, along with the correct bevel angles and the surface finish meeting the required roughness levels. High-quality butt-weld pipe fittings that meet ASME B16.9 standards have a uniform surface quality and precise dimensional tolerances that make it easy to connect them to existing pipeline systems. Professional inspection teams use calibrated measuring tools to compare important dimensions to engineering specs. They write down any differences that need to be fixed before installation can begin.
Material Verification Methods
Material traceability and composition verification ensure Butt Weld Fittings meet specified metallurgical requirements for the intended service environment. Chemical composition analysis through portable spectrometers confirms alloy content, carbon levels, and trace elements that directly impact mechanical properties and corrosion resistance. Material certificates from manufacturers provide essential documentation linking individual fittings to heat treatment records, mill test certificates, and quality control data. Carbon steel, stainless steel, and specialty alloy fittings require different verification protocols based on their intended applications and operating conditions. Advanced testing methods include positive material identification, hardness testing, and microstructural examination to validate heat treatment effectiveness and grain structure uniformity throughout the fitting's cross-section.
Dimensional Accuracy Assessment
Precise dimensional control ensures proper fit-up and eliminates installation difficulties that could compromise joint integrity. Butt Weld Fittings undergo comprehensive dimensional inspection using coordinate measuring machines, laser scanners, and traditional measuring instruments to verify conformance with engineering drawings. Critical measurements include outside diameter, wall thickness, center-to-end dimensions, and angular relationships that affect alignment with adjacent piping components. Customizable bend radii require special attention during dimensional verification, as variations can create stress concentrations or interference with surrounding equipment. Quality control protocols establish acceptable tolerance ranges based on applicable codes and standards, ensuring dimensional accuracy supports optimal welding conditions and long-term structural performance in demanding industrial applications.
Welding Quality Evaluation
Non-Destructive Testing Protocols
Non-destructive testing represents a critical component in evaluating weld quality for Butt Weld Fittings without compromising their structural integrity. When you use x-rays to check weld joints, they show you any problems inside them, like holes, inclusions, or gaps in the fusion that could cause the joint to fail early. Utilizing sound wave propagation to find subsurface discontinuities, ultrasonic testing provides an alternative way to check thick walls where radiographic penetration becomes difficult. Liquid penetrant testing finds flaws that break the surface of welded metal and areas affected by heat. It works especially well for finding small cracks or surface holes. 100% RT-tested welds make sure that all critical joints are covered, and they provide proof that the quality of the weld meets strict industry standards for safety-critical uses.
Weld Profile and Geometry Analysis
Weld profile evaluation ensures Butt Weld Fittings achieve optimal stress distribution and mechanical performance through proper joint geometry. Profile gauges and digital measurement systems verify weld reinforcement height, root penetration, and face/root concavity within acceptable limits established by welding procedures. Proper weld geometry minimizes stress concentrations while maintaining adequate cross-sectional area to handle design loads throughout the component's service life. Angular distortion measurements confirm that welding operations maintain fitting alignment and prevent installation difficulties or excessive stresses in connected piping systems. Advanced laser scanning technology provides detailed three-dimensional mapping of weld profiles, enabling comprehensive analysis of geometric parameters that influence fatigue resistance and structural integrity.
Heat-Affected Zone Inspection
Heat-affected zone evaluation addresses microstructural changes in base material adjacent to weld joints in Butt Weld Fittings. Hardness testing across the weld zone identifies potential hard spots or soft zones that could create failure initiation points under cyclic loading conditions. Metallographic examination reveals grain structure modifications, precipitate formation, and phase transformations that affect mechanical properties and corrosion resistance. Proper heat treatment procedures minimize adverse effects in heat-affected zones, maintaining uniform properties throughout the fitting assembly. Temperature monitoring during welding operations ensures thermal cycles remain within acceptable limits to prevent excessive hardening or grain growth that could compromise long-term performance in critical service applications.
Post-Welding Verification
Pressure Testing Requirements
Hydrostatic testing validates the pressure-containing capability of Butt Weld Fittings under controlled conditions that simulate actual service loads. Test pressure levels typically exceed design pressure by specified safety factors, ensuring adequate strength margins for safe operation throughout the component's design life. Pressure holding periods allow detection of minor leaks or gradual pressure drops that indicate potential joint integrity issues requiring immediate attention. Digital pressure monitoring systems provide precise control and documentation of test parameters, creating permanent records for quality assurance and regulatory compliance purposes. Proper test medium selection prevents contamination while ensuring effective leak detection during pressurization cycles.
Final Documentation Standards
Comprehensive documentation packages for Butt Weld Fittings provide essential traceability and quality assurance records for regulatory compliance and maintenance planning. Material test reports, welding procedure qualifications, welder certifications, and inspection records create complete documentation chains linking individual components to manufacturing and installation quality control measures. Throughout the operating life cycle of a facility, digital documentation systems make it easy to store, find, and share high-quality records. Taking pictures of important inspection points can show that quality standards are being met and be used as a guide for future maintenance tasks. Standardized forms for reporting make sure that documentation packages are the same and contain all the necessary information for all projects and installation teams.
Conclusion
Actualizing orderly quality assessment strategies for Butt Weld Fittings guarantees dependable pipeline execution whereas minimizing operational dangers and upkeep costs. Through comprehensive pre-installation, welding, and post-welding confirmation conventions, quality control groups can distinguish and address potential issues some time recently they affect framework judgment. These set up methods bolster administrative compliance whereas conveying the execution guidelines anticipated in basic mechanical applications.
HEBEI RAYOUNG PIPELINE: Leading Butt Weld Fittings Manufacturers
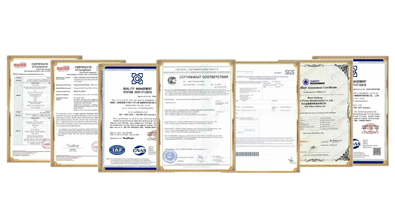
At HEBEI RAYOUNG PIPELINE TECHNOLOGY CO., LTD., we understand that exceptional infrastructure begins with dependable Butt Weld Fittings that exceed industry expectations. As leading pipes and fittings manufacturers, our commitment to consistent quality, ISO 9001:2015 certification, and continuous innovation ensures every product meets the demanding requirements of modern industrial applications. Along with carbon steel, stainless steel, and specialty alloy fittings with GOST-R and SGS approvals for global export compliance, we offer a wide range of products. For both simple and complex commercial installations and home projects, our fittings provide the dependability and performance that engineers need. Are you ready to see how RAYOUNG can differentiate your next project? Contact our technical team today at info@hb-steel.com to discuss your specific requirements and discover how our expertise can enhance your pipeline systems.
References
1. American Society of Mechanical Engineers. "ASME B16.9 - Factory-Made Wrought Buttwelding Fittings." ASME International, 2018.
2. Johnson, R.K., and Mitchell, P.A. "Quality Control Procedures for Welded Pipe Fittings in Industrial Applications." Journal of Pipeline Engineering, vol. 45, no. 3, 2019, pp. 234-251.
3. International Organization for Standardization. "ISO 9001:2015 Quality Management Systems - Requirements." ISO Publications, 2015.
4. Thompson, D.L. "Non-Destructive Testing Methods for Butt Weld Joint Inspection." Materials Testing Quarterly, vol. 38, no. 2, 2020, pp. 89-104.
5. Wilson, S.M., et al. "Dimensional Accuracy Standards for Pipe Fitting Manufacturing." Industrial Quality Review, vol. 52, no. 4, 2021, pp. 156-173.
6. Chen, L.H., and Rodriguez, C.E. "Heat-Affected Zone Analysis in Welded Steel Pipe Components." Welding Research International, vol. 41, no. 7, 2022, pp. 301-318.

Need a quote? Want to see samples? Just say hello. We’re friendly. We’re fast. And we’re ready when you are.
Welcome to RAYOUNG – Strong Pipes, Stronger Promise
