Top 10 Testing Methods for Ensuring Quality in Steel Pipe Fittings
When it comes to industrial, business, and residential piping systems, quality assurance in steel pipe fittings is a key factor in determining how safe, reliable, and long-lasting they are. A lot of tests are done on steel pipe fittings before they are put into service to find any problems, make sure they meet the material requirements, and make sure the measurements are correct. The ten most important testing methods used by top manufacturers and quality control experts to make sure that every part meets strict industry standards are covered in this book. A lot of quality assurance programs depend on these methods, which include non-destructive testing that finds flaws inside things and mechanical tests that make sure they are strong. Professionals in purchasing, engineering, and project management can make smart choices about which providers to work with and what needs to be tested when they are working on important piping infrastructure projects when they understand these testing methods.
Non-Destructive Testing Techniques for Steel Pipe Fittings
Ultrasonic Testing for Internal Defect Detection
Ultrasonic testing is one of the most effective ways to check the inside of steel pipe fittings without damaging them. High-frequency sound waves are used in this method. These waves go through the material and bounce back when they hit breaks like cracks, holes, inclusions, or laminations. Ultrasonic technology today is very sensitive and can find flaws in thick-walled steel pipe fittings that are as small as a few millimeters across. The method works especially well in important situations where flaws inside the material could cause it to fail completely when exposed to high or low temperatures or pressure. Advanced phased array ultrasonic systems can fully inspect the inside of complex shapes like elbows, tees, and reducers, giving a thorough map of the material conditions throughout the whole fitting.
Radiographic Examination for Weld Quality Verification
To make pictures of the inside structure and weld quality of steel pipe fittings, radiographic testing uses X-rays or gamma rays. This is why it is so important for buttweld components. Radiation is sent through the material and makes a picture on film or a digital detector. This method exposes the fittings to radiation. Images from x-rays are very good at finding problems in welds, like holes, slag inclusions, incomplete fusion, and lack of penetration, that threaten the stability of the joint. For important jobs with high pressures, toxic fluids, or dangerous situations, radiographic testing gives the most reliable assurance of weld quality, even though it takes longer and costs more than some other methods. These days, improvements in digital radiography have cut down on exposure times, improved picture quality, and gotten rid of the need for chemical processing. This makes the process better for the environment and faster for checking steel pipe fittings.
Magnetic Particle Inspection for Surface and Near-Surface Flaws
Magnetic particle inspection is a quick and cheap way to find surface and shallow underground flaws in ferromagnetic steel pipe fittings by showing where magnetic flux is leaking. The technician magnetizes the part and adds iron particles that gather in places where magnetic fields can't reach because of breaks like cracks, gaps, or inclusions. This method is very good at finding flaws in the manufacturing process, damage, and fatigue cracks that might not be noticeable with just a visual inspection. When looked at under ultraviolet light, fluorescent magnetic particles make defects easier to see. This makes it easier to find small or tight cracks in steel pipe fittings.
Chemical and Mechanical Property Verification Methods
Chemical Composition Analysis Through Spectrometry
Verifying the chemical composition correctly makes sure that steel pipe fittings meet the standards for the material grade and have the right mechanical properties, resistance to corrosion, and ability to be welded. The most common way to do an analysis is optical emission spectrometry, which involves vaporizing a small sample of material and looking at the light spectrum that is released to get exact amounts of constituent elements. Testing shows the amount of carbon and alloying elements like molybdenum, nickel, and chromium. Manufacturing mistakes involving mixing materials can have bad results, so it is important to be able to positively identify materials. Rapid field verification is possible with portable X-ray fluorescence analyzers, and for critical steel pipe fittings uses, laboratory spectrometry is the most accurate method.
Tensile Strength and Yield Point Determination
Mechanical testing through tensile specimens machined from steel pipe fittings provides direct measurement of strength properties including ultimate tensile strength, yield strength, and elongation characteristics. Testing machines apply gradually increasing loads to standardized specimens while measuring deformation, generating stress-strain curves that reveal material behavior. These properties determine the pressure ratings, safety factors, and service conditions suitable for specific fittings within piping systems. Yield strength indicates the stress level at which permanent deformation begins, representing a critical design parameter. Steel pipe fittings must meet minimum mechanical property requirements specified in applicable standards such as ASME, ASTM, or international equivalents to ensure adequate safety margins.
Hardness Testing for Material Consistency Validation
By measuring how resistant a material is to being dented, hardness testing quickly tells you about its features and how well heat treatment works on steel pipe fittings. There are many hardness scales, such as Brinell, Rockwell, and Vickers, that can be used for different types of materials and thicknesses. It is useful for quality control screening because hardness is related to tensile strength, wear resistance, and the right way to heat treat something. Modern hardness testing methods don't damage parts, so they can be used for a full check without any problems. Portable measuring tools let you take readings on steel pipe fittings that are already installed, which makes in-service check programs easier.
Dimensional Accuracy and Pressure Integrity Verification
Dimensional Inspection and Geometric Tolerance Verification
Precise dimensional control ensures proper fit-up, leak-free connections, and optimal flow characteristics in assembled piping systems incorporating steel pipe fittings. Coordinate measuring machines, laser scanners, and traditional measurement tools verify critical dimensions including outside diameter, wall thickness, center-to-face distances, and angular measurements. Wall thickness measurements using ultrasonic gauges confirm adequate material for pressure containment and corrosion allowances. Geometric tolerances including concentricity and perpendicularity affect gasket sealing and weld preparation quality. Steel pipe fittings with complex geometries require comprehensive inspection protocols covering internal and external profiles to ensure uniform wall thickness and proper flow paths.
Hydrostatic Pressure Testing for Leak Detection
During hydrostatic testing, steel pipe fittings are put under more pressure than they would normally be under in normal use. This checks the integrity of the pressure limit and finds leaks before the parts are put into service. When testing, water is usually used as the test medium and the pressure is set to 1.5 times the normal working pressure. This test is the best way to be sure that parts can safely hold design pressures without breaking or leaking. Pressure testing finds flaws in the manufacturing process like pinholes, porosity, and incomplete welds that other checking methods might miss. Individual hydrostatic testing is often done on steel pipe fittings that are going to be used in critical situations. This gives the highest level of confidence in their pressure stability.
Visual and Dimensional Examination of Surface Conditions
Visual inspection represents the most fundamental yet essential quality verification method, detecting surface defects, marking legibility, and overall workmanship quality in steel pipe fittings through systematic examination. Surface conditions including cracks, laps, seams, and corrosion receive evaluation against acceptance standards. Identification markings including material grade, heat number, and manufacturer identification must remain legible for traceability. Visual inspection occurs at multiple manufacturing stages, catching defects early when correction costs remain minimal. Documentation systems record inspection findings, establishing quality records that support traceability requirements and regulatory compliance for steel pipe fittings.
Conclusion
To make sure that steel pipe fittings manufacturer products are of high quality, these testing methods must be carefully combined in a way that balances thoroughness with cost. Test programs that work well use risk-based methods that make inspections more thorough for important applications while making verifications easier for common ones. Working with companies that have strong quality control systems will help you get reliable goods with full documentation.
HEBEI RAYOUNG PIPELINE: Your Quality-Certified Steel Pipe Fittings Supplier
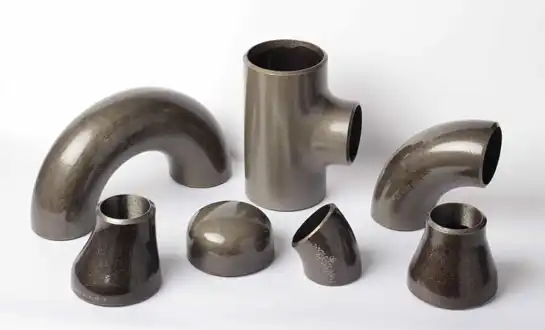
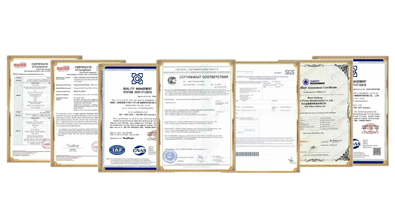
HEBEI RAYOUNG PIPELINE TECHNOLOGY CO., LTD. makes steel pipe fittings that are better than industry standards because they are tested and certified very carefully. We offer many types of industrial pipe fittings, such as buttweld carbon steel elbows, tees, reducers, and pipe flanges, which make sure that connections are safe and come with full quality assurance. Our line of products has answers for all kinds of design needs, from simple straight lines to complicated angles to flexible joints. We are always striving for greatness, as shown by the GOST-R and SGS certifications that prove our export compliance and ISO 9001:2015 quality management systems. As a top maker of pipes and fittings, we know that the success of your project depends on steel pipe fittings that work perfectly in tough conditions. Contact our technical team at info@hb-steel.com to discuss your quality requirements and discover how our certified steel pipe fittings deliver the performance your projects demand.
References
1. American Society for Testing and Materials. (2023). ASTM E213: Standard Practice for Ultrasonic Testing of Metal Pipe and Tubing. ASTM International Standards Publication.
2. American Society of Mechanical Engineers. (2024). ASME Section V: Nondestructive Examination Methods for Pressure Equipment. ASME Boiler and Pressure Vessel Code.
3. British Standards Institution. (2023). BS EN ISO 17640: Non-Destructive Testing of Welds - Ultrasonic Testing Techniques. BSI Standards Publication.
4. Cartz, L. & Henderson, M.R. (2024). Nondestructive Testing Handbook: Volume 7 - Ultrasonic Testing for Pipeline Components. American Society for Nondestructive Testing, Fourth Edition.
5. Miller, R.K. & McIntire, P. (2023). Quality Control and Testing Methods for Industrial Pipe Components. Materials Evaluation Journal, Volume 81, Issue 6, pp. 534-558.
6. International Organization for Standardization. (2024). ISO 6508: Metallic Materials - Hardness Testing Standards for Industrial Applications. ISO Technical Committee Report.

Need a quote? Want to see samples? Just say hello. We’re friendly. We’re fast. And we’re ready when you are.
Welcome to RAYOUNG – Strong Pipes, Stronger Promise
