How to Verify Pipe Fitting Dimensions According to ASME Standards?
If you are using pipe fittings in industry, you should make sure that the sizes match ASME standards. This will keep the system safe, working well, and in good shape. This verification process involves understanding standardized measurement protocols, utilizing precise inspection tools, and following documented procedures that align with ASME B16.9, B16.11, and B16.5 specifications. Steel pipe fittings must meet exact dimensional tolerances to guarantee proper installation, prevent leaks, and maintain structural reliability throughout their service life. The verification procedure includes measuring from the center to the face, checking the wall thickness, checking the diameter, and confirming the angle. Engineers and quality control professionals can be sure that parts meet project specifications before they are installed by following established standards and using systematic inspection routines. Everywhere in the world, this makes sure that the project meets scientific standards. Also, they don't have to do the same pricey work over and over again.
Understanding ASME Dimensional Standards for Pipe Fittings
Standard Specifications and Classification Systems
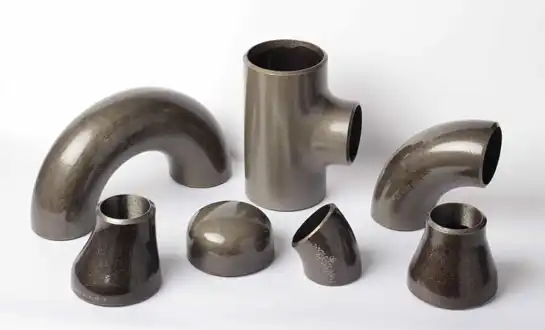
ASME standards provide comprehensive frameworks for categorizing and measuring steel pipe fittings across various industrial applications. The B16.9 standard specifically addresses factory-made wrought buttwelding fittings, establishing precise dimensions for elbows, tees, reducers, and caps. People who make things have to follow these rules. They have numbers that show how wide, tall, and thick the walls are. The classification system distinguishes between long radius and short radius elbows, concentric and eccentric reducers, and various tee configurations. When procurement teams know these categories, they can be very specific about what they need, and quality inspectors may check that the work meets those needs. The standards also take into consideration tolerances in production, which means that little differences are okay as long as they are within certain limitations. Steel pipe fittings according to ASME standards are interchangeable across vendors, which makes it easier to manage inventories and trade throughout the world. Engineers rely on these standardized dimensions when designing piping systems, confident that components from certified manufacturers will integrate seamlessly during construction phases.
Key Dimensional Parameters and Tolerance Ranges
Critical dimensional parameters for steel pipe fittings include outside diameter, wall thickness, center-to-end measurements, and angular orientations. Asme guidelines set acceptable limits for each measure that make sure the needs of production and the needs of the product are met. Outside diameter tolerances typically range from ±1% for smaller fittings to tighter specifications for precision applications. Wall thickness measurements must fall within prescribed minimums to ensure pressure-bearing capacity while avoiding excessive material that increases costs unnecessarily. Center-to-end dimensions for elbows and tees directly impact piping layout accuracy, with tolerances generally specified in millimeters or fractions of inches depending on nominal size. Angular tolerances for elbows ensure proper directional changes, with 90-degree elbows typically requiring accuracy within ±1 degree. You can make changes to these mistake numbers and still meet the system's speed needs. Quality inspectors must reference the appropriate ASME standard sections when verifying dimensions, as requirements vary between fitting types, sizes, and schedule classes. Objective proof of agreement must be shown by comparing measured values to known limits. This is needed for the project to be approved and for it to follow the rules.
Material Specifications and Their Impact on Dimensions
Material composition significantly influences dimensional characteristics of steel pipe fittings throughout manufacturing and service life. ASME standards reference material specifications from ASTM, such as A234 for wrought carbon steel and low-alloy fittings, which define chemical composition and mechanical properties. Different materials have different thermal expansion coefficients, which means that their dimensions change with temperature changes that happen during use. Carbon steel fittings may experience slight dimensional changes during heat treatment processes required to achieve specified mechanical properties. When forming, adding alloys might change how materials flow, which could affect the uniformity of wall thickness and the consistency of radius. Quality verification must account for material-specific considerations, ensuring that dimensional measurements reflect final condition after all manufacturing processes complete. Steel pipe fittings produced from higher-grade materials may justify tighter dimensional tolerances due to enhanced manufacturing control and reduced variation. Understanding the relationship between material specifications and dimensional outcomes enables more accurate verification protocols and realistic acceptance criteria that balance performance requirements with manufacturing practicality.
Measurement Tools and Inspection Techniques
Precision Measuring Instruments and Their Applications
Accurate dimensional verification requires appropriate measuring instruments selected based on tolerance requirements and fitting geometry. Digital vernier calipers can measure the outer diameter and the distance from the center to the end with an accuracy of up to 0.02mm. Micrometers make it easier to check the thickness of walls by measuring at many spots around the circle to find differences. Ultrasonic thickness gauges enable non-destructive wall thickness assessment without requiring cutting or sectioning, particularly valuable for large-diameter steel pipe fittings. Coordinate measuring machines (CMM) are very accurate tools that can measure many things at once and give detailed information about complicated shapes. Radius gauges verify bend radii on elbows, ensuring conformance to long radius or short radius classifications. Thread gauges assess threaded connections on socket weld and threaded fittings, confirming proper engagement characteristics. To keep measurements accurate and traceable, each instrument has to be calibrated against approved standards on a regular basis. Inspection personnel must demonstrate proficiency in tool operation and understand measurement uncertainty principles to interpret results correctly and make informed acceptance decisions.
Systematic Inspection Procedures and Documentation
Effective verification of steel pipe fittings demands systematic inspection procedures that ensure comprehensive evaluation and consistent results. Inspection plans should identify all critical dimensions requiring verification, reference applicable ASME standard sections, and specify acceptable tolerance ranges. Sequential measurement protocols prevent oversight, typically progressing from gross dimensions like overall length to finer details such as wall thickness variations. Multiple measurements at different locations detect manufacturing inconsistencies, with standards often requiring measurements at specified intervals around circumferences or along lengths. The surroundings during a check can change how accurate measurements are, so temperature-controlled areas are needed for precise work. Documentation practices must capture measured values, inspector identification, measurement equipment used, and environmental conditions. Inspection reports comparing measured dimensions against standard requirements provide clear accept/reject decisions with supporting data. Photographic documentation supplements numerical data, particularly for geometric features difficult to describe textually. It's easier to look at data, find trends, and keep an eye on quality over time when digital recording is used. This is true for both between production runs and to see how well providers are doing.
Non-Destructive Testing Methods for Internal Verification
Beyond external dimensional measurements, internal characteristics of steel pipe fittings require verification to ensure complete conformance. Radiographic testing reveals internal defects, wall thickness variations, and material discontinuities without damaging components. Ultrasonic testing assesses wall thickness from external surfaces, detecting internal corrosion, laminations, or manufacturing defects that compromise integrity. Liquid penetrant testing finds faults that break the surface on both internal and exterior surfaces, making sure that the weld is good and the material is sound. Magnetic particle examination finds subsurface breaks in ferromagnetic materials, which works well with other procedures for a full assessment. These non-destructive methods show that the interior dimensions and material conditions match ASME standards in ways that exterior measurements can't. Adding non-destructive testing to verification processes gives you assurance that steel pipe fittings will work dependably for the whole time they are supposed to. Testing frequency and method selection depend on application criticality, with high-pressure or hazardous service requiring more rigorous inspection than low-risk applications. Qualified technicians certified to relevant standards must perform and interpret non-destructive tests, ensuring reliable results and proper documentation.
Compliance Verification and Quality Assurance
Certification Requirements and Traceability
ASME compliance verification extends beyond dimensional measurements to encompass material certification, manufacturing process validation, and complete traceability documentation. Material test reports (MTR) provide chemical composition and mechanical property data, confirming conformance to specified material standards. With heat numbers, you can connect parts to specific runs of production, which makes it easier to find and fix quality issues that arise after installation. Manufacturing records document forming processes, heat treatments, and quality control checkpoints, demonstrating systematic quality management. Third-party inspection certifications from recognized bodies give independent proof that ASME standards are being met. This is typically necessary for important uses or to follow the law. Steel pipe fittings destined for international projects may require additional certifications such as PED for European markets or specific customer approval documents. Shipments come with complete traceability packages that enable receiving inspectors check the authenticity and compliance of the items before they accept them. Digital certification systems are taking the role of paper documents more and more. This makes it easy to get them and less likely that you'll lose them. Verification protocols should confirm that all required certifications accompany physical materials and that documentation content aligns with ASME requirements and project specifications.
Quality Management Systems and Continuous Improvement
Robust quality management systems underpin consistent production of ASME-compliant steel pipe fittings, with ISO 9001:2015 certification demonstrating systematic quality control. Manufacturing facilities implement documented procedures for dimensional verification at multiple production stages, preventing non-conforming products from progressing through manufacturing. Statistical process control keeps an eye on dimensional trends so that changes may be made before they go beyond acceptable bounds. Internal audits check to see whether procedures are being followed and find ways to make things better. Review by management Make sure that there are enough tools to reach the standard goals. Supplier quality programs make sure that all suppliers, including those who provide raw materials and subcontractors, meet quality standards. This helps make sure that quality is good all along the supply line. Continuous improvement programs look at quality data to find the main reasons for changes in size and then take steps to fix them. Comments about how specs work in real life can help us make them better and the way we do things better. Buying high-tech production and inspection tools shows a dedication to quality and precision. Training programs make sure that employees know what ASME requires and have the skills they need to do correct verification and keep improving quality.
Handling Non-Conformances and Corrective Actions
Despite rigorous controls, dimensional non-conformances occasionally occur, requiring systematic evaluation and resolution processes. Non-conforming steel pipe fittings must be segregated immediately to prevent inadvertent use in critical applications. Disposition decisions consider deviation magnitude, application requirements, and potential use-as-is justifications supported by engineering analysis. Rework options may include dimensional corrections through machining or reformation when economically feasible and technically sound. Scrap decisions apply when deviations compromise safety, performance, or cannot be economically corrected. How the workers did their jobs, the state of the tools, and the things that changed the process are all looked at in root cause analysis to figure out what went wrong. Plans for corrective action deal with the underlying causes that have been found and make modifications to stop them from happening again. Effectiveness verification confirms corrective actions achieve intended improvements without creating new quality issues. It shows that you care about quality control and want to keep getting better if you keep track of non-conformances and how they were fixed. People will trust you more if you're honest with them about problems and how you're fixing them. You should do this if you want to work with that person again because it shows that you are skilled.
Conclusion
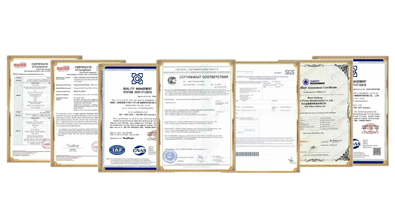
You need to know all the rules, how to measure properly, and how to follow a quality control method to make sure that pipe parts are the right size from ASME. Each stage of the verification process, from the first material certification to the last dimensional inspection, helps make sure that steel pipe fittings fulfill strict standards for safe, dependable use. Organizations that invest in proper inspection equipment, qualified personnel, and robust quality systems consistently deliver ASME-compliant components that support infrastructure integrity across industries. HEBEI RAYOUNG PIPELINE TECHNOLOGY CO., LTD maintains rigorous verification protocols backed by GOST-R, SGS, and ISO 9001:2015 certifications, ensuring dimensional accuracy and quality excellence in every product.
FAQ
1. What are the most critical dimensions to verify on steel pipe fittings?
The most critical dimensions include outside diameter, wall thickness, center-to-end measurements, and angular accuracy for elbows. These things directly affect how well the system works, how much pressure it can handle, and how precisely it was installed. Verification should prioritize dimensions that impact safety and functionality, with measurement frequency and precision matching application criticality and ASME tolerance requirements specified for each fitting type and size classification.
2. How often should measurement equipment be calibrated for ASME verification?
Measurement equipment requires calibration at intervals ensuring accuracy throughout use periods, typically annually for general-purpose tools and more frequently for precision instruments or high-volume inspection environments. Calibration against certified standards traceable to national metrology institutes maintains measurement validity. Organizations should establish calibration schedules based on manufacturer recommendations, usage intensity, and quality system requirements, with documentation confirming calibration status before each inspection activity.
3. Can dimensional deviations ever be acceptable for steel pipe fittings?
Minor deviations within ASME-specified tolerance ranges are acceptable and reflect normal manufacturing variation. Deviations that go above typical tolerances need to be looked at by engineers to see whether they are acceptable based on the unique needs of the application, stress analysis, and performance effect assessment. Use-as-is dispositions must be technically justified and documented, with customer approval often required for contract compliance. Safety-critical applications typically demand stricter adherence to nominal dimensions than less critical services.
4. What documentation is required to demonstrate ASME compliance?
ASME compliance documentation includes material test reports confirming chemical and mechanical properties, dimensional inspection reports comparing measurements against standard requirements, manufacturing certifications, heat treatment records, and third-party inspection certificates when specified. Complete traceability linking physical components to all supporting documentation enables verification of conformance. Digital documentation systems are becoming more common in addition to conventional paper certificates. The truth and accuracy of the information are protected by these methods, which make it easier to get to information.
HEBEI RAYOUNG PIPELINE: Your Trusted Steel Pipe Fittings Manufacturer
At HEBEI RAYOUNG PIPELINE TECHNOLOGY CO., LTD., we believe that excellent infrastructure starts with dependable materials. We are one of the best makers of pipes and fittings, and we make steel pipe fittings that last. Our comprehensive product range includes buttweld elbows, reducers, and flanges manufactured to precise ASME dimensional standards, backed by ISO 9001:2015, GOST-R, and SGS certifications. We know how important it is to get the dimensions right, therefore we use strict verification procedures throughout manufacturing to make sure that every part fits the precise requirements. Our experienced quality team utilizes advanced inspection equipment and systematic procedures, guaranteeing that steel pipe fittings delivered to your project perform reliably from installation through decades of service. Whether your application involves water systems, gas lines, or industrial process piping, our commitment to consistent quality, technical innovation, and customer satisfaction makes us your ideal partner for dependable carbon steel pipe solutions. Contact us today at info@hb-steel.com to discuss your project requirements and experience the RAYOUNG difference in quality, reliability, and professional service that supports your success.
References
1. American Society of Mechanical Engineers. (2018). ASME B16.9: Factory-Made Wrought Buttwelding Fittings. New York: ASME Press.
2. American Society of Mechanical Engineers. (2016). ASME B16.11: Forged Fittings, Socket-Welding and Threaded. New York: ASME Press.
3. ASTM International. (2019). ASTM A234: Standard Specification for Pipe Fittings of Wrought Carbon Steel and Alloy Steel for Moderate and High Temperature Service. West Conshohocken: ASTM International.
4. Nayyar, M. L. (2020). Piping Handbook, Eighth Edition. New York: McGraw-Hill Education.
5. Smith, P. R. & Zappe, R. W. (2017). Valve Selection Handbook: Engineering Fundamentals for Selecting the Right Valve Design. Burlington: Elsevier Science.
6. Parisher, R. A. & Rhea, R. A. (2021). Pipe Drafting and Design, Fourth Edition. Cambridge: Gulf Professional Publishing.

Need a quote? Want to see samples? Just say hello. We’re friendly. We’re fast. And we’re ready when you are.
Welcome to RAYOUNG – Strong Pipes, Stronger Promise
