How Radiographic Testing Ensures Quality in Butt Weld Fittings?
Radiographic testing is the most important part of making sure the quality of butt weld fittings because it gives us a unique look at the soundness of the weld without damaging it. X-rays or gamma rays are used in this advanced checking method to see inside welded joints and find flaws that could weaken the structure of butt weld fittings. In critical situations where pipe fitting problems could cause environmental damage, safety risks, and big economic losses across industries, it's impossible to say enough about how important radiography testing is.
Understanding Radiographic Testing Principles for Butt Weld Fittings
X-Ray and Gamma Ray Penetration Methods
Radiographic testing operates on the fundamental principle that electromagnetic radiation can penetrate materials to varying degrees, creating images that reveal internal structures and defects. When applied to butt weld fittings, X-rays or gamma rays pass through the welded joint, with different materials and densities absorbing radiation at different rates. This differential absorption creates a shadow image on photographic film or digital detectors, allowing inspectors to identify discontinuities such as porosity, inclusions, cracks, and incomplete penetration within the weld metal. The butt weld pipe fitting construction requires precise welding parameters, and radiographic testing validates that these parameters have been correctly applied throughout the joint formation process.
Film Processing and Image Interpretation
The film processing stage represents a critical component of radiographic testing for butt weld fittings, requiring specialized darkroom facilities and precise chemical processing procedures. Developed radiographs must exhibit proper density, contrast, and definition to enable accurate interpretation of weld quality. Certified radiographic interpreters examine these images using standardized penetrameters and reference standards to determine the size, location, and significance of any detected discontinuities. The interpretation process follows established codes such as ASME Section VIII or AWS D1.1, ensuring that butt weld fittings meet specified acceptance criteria for their intended service conditions.
Digital Radiography Advancements
Advanced advanced radiography frameworks have revolutionized quality control for butt weld fittings by giving prompt picture accessibility and upgraded picture control capabilities. Computerized locators supplant conventional film, advertising prevalent affectability to distinguish littler discontinuities and giving real-time input amid the review handle. These frameworks permit for picture improvement procedures such as differentiate alteration, amplification, and thickness profiling, empowering more intensive assessment of butt weld fittings quality. The computerized arrange too encourages simple capacity, recovery, and transmission of assessment records, supporting comprehensive quality administration frameworks.
Critical Defect Detection in Butt Weld Fittings
Porosity and Gas Inclusion Identification
Porosity represents one of the most common defects in butt weld fittings, typically resulting from trapped gases during the welding process or contamination of the base materials. Radiographic testing excels at detecting both isolated pores and clustered porosity patterns that could weaken the structural integrity of the joint. The rounded, dark indications visible on radiographs indicate gas-filled voids within the weld metal, and their size, distribution, and quantity must be evaluated against applicable standards. Systematic porosity in butt weld fittings often indicates problems with welding technique, shielding gas coverage, or base material preparation that require immediate corrective action.
Incomplete Penetration and Fusion Defects
Incomplete penetration and lack of fusion defects pose serious threats to the integrity of butt weld fittings, as they create stress concentration points that can lead to premature failure under operating conditions. Radiographic testing reveals these defects as linear indications with sharp, well-defined edges that distinguish them from acceptable weld profiles. Root penetration defects appear as dark lines along the weld centerline, while sidewall lack of fusion manifests as linear indications parallel to the weld edges. The detection and evaluation of these defects in butt weld fittings requires careful attention to radiographic technique, including proper beam alignment and adequate source-to-film distance.
Crack Detection and Characterization
Because they can spread under service loads and cause catastrophic failures, cracks are the most hazardous type of weld fault in butt weld fittings. Cold cracks emerge after welding is finished, while hot cracks form during solidification; both types of fractures may be detected by radiographic examination. Radiographs may show these flaws as thin, black lines and they may have the branching patterns seen in stress-related cracks. Even tiny fractures in butt weld fittings may necessitate repair or component rejection based on service requirements and relevant regulations, therefore it's important to meticulously record their orientation, length, and position.
Quality Standards and Testing Procedures
Industry Code Requirements
Comprehensive requirements for radiographic testing techniques, acceptance criteria, and documentation processes are established by quality standards for butt weld fittings. Radiographic analysis of welded joints is thoroughly outlined in major codes including AWS D1.1, API 1104, and ASME Section VIII Division 1. These codes describe parameters like minimum film quality, penetrameter sensitivity, and fault acceptability limits. Whether in structural applications, pipeline systems, or pressure vessels, these standards make sure that butt weld fittings are up to snuff in terms of quality. Welded joints are guaranteed to operate and be safe for the long term when they are compliant with these requirements.
Calibration and Standardization Procedures
Accurate radiographic testing of butt weld fittings depends on proper calibration of equipment and standardization of procedures across different operators and facilities. Regular calibration of X-ray machines and gamma ray sources ensures consistent radiation output and proper exposure parameters. Standardization includes the use of reference standards, penetrameters, and image quality indicators that provide quantitative measures of system performance. Training and certification programs for radiographic technicians ensure consistent application of testing procedures and interpretation criteria for butt weld fittings inspection.
Documentation and Traceability Requirements
Radiographic testing procedures for butt weld fittings must include thorough documentation to meet quality assurance goals and preserve inspection data for future reference. Radiography method sheets, exposure charts, film identification systems, interpretation reports that connect individual welds to their inspection findings, and other similar documents are usually necessary. Every butt weld fitting may be traced using a system that starts with sourcing the materials and ends with delivery and inspection. In mission-critical systems, this documentation bolsters quality control goals and regulatory compliance mandates.
Conclusion
Butt weld fittings for sale require radiographic testing as a vital quality control measure since it reliably identifies interior flaws that can jeopardize the joint's integrity and safety. To guarantee their goods are up to the rigorous standards of quality and dependability needed for contemporary industrial applications, manufacturers systematically use specified testing techniques and acceptance criteria.
FAQ
1. What is the minimum thickness for radiographic testing of butt weld fittings?
Most industry standards require radiographic testing for butt weld fittings with wall thicknesses exceeding 19mm (3/4 inch), though specific requirements vary depending on the application, service conditions, and applicable codes. Thinner sections may also require testing in critical applications.
2. How does radiographic testing compare to ultrasonic testing for butt weld fittings?
While both methods detect internal defects, radiographic testing provides a permanent visual record and excels at detecting planar defects, whereas ultrasonic testing offers real-time results and better sensitivity for certain defect orientations in butt weld fittings.
3. What are the typical acceptance criteria for porosity in butt weld fittings?
Acceptance criteria for porosity typically limit individual pore size to 3mm maximum diameter and restrict the total porosity area to specific percentages of the weld cross-section, though exact limits depend on applicable codes and service requirements.
4. How long should radiographic records be retained for butt weld fittings?
Industry standards typically require retention of radiographic records for the service life of butt weld fittings, with minimum retention periods ranging from 5 to 25 years depending on the application and regulatory requirements.
HEBEI RAYOUNG PIPELINE: Leading Butt Weld Fittings Manufacturers
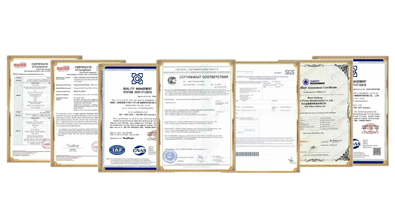
At HEBEI RAYOUNG PIPELINE TECHNOLOGY CO., LTD., we believe that excellent infrastructure starts with dependable materials. As one of the leading pipes and fittings manufacturers, we supply high-quality butt weld fittings that stand the test of time through rigorous quality control including comprehensive radiographic testing programs. Our ISO 9001:2015 certified manufacturing processes ensure that every butt weld fitting meets international standards for performance, safety, and durability. With GOST-R and SGS certifications for export compliance, we serve domestic and global markets with confidence. Trust RAYOUNG for your critical piping applications - contact us at info@hb-steel.com for expert consultation and premium butt weld fittings solutions.
References
1. American Welding Society. (2020). Structural Welding Code - Steel, AWS D1.1/D1.1M. Miami: AWS.
2. American Society of Mechanical Engineers. (2019). Boiler and Pressure Vessel Code, Section VIII Division 1. New York: ASME.
3. American Petroleum Institute. (2018). Welding of Pipelines and Related Facilities, API Standard 1104. Washington: API.
4. International Organization for Standardization. (2017). Non-destructive testing - Radiographic testing, ISO 17636-1. Geneva: ISO.
5. American Society for Testing and Materials. (2019). Standard Practice for Radiographic Examination, ASTM E94. West Conshohocken: ASTM.
6. European Committee for Standardization. (2018). Non-destructive testing of welds - Radiographic testing, EN ISO 17636-2. Brussels: CEN.

Need a quote? Want to see samples? Just say hello. We’re friendly. We’re fast. And we’re ready when you are.
Welcome to RAYOUNG – Strong Pipes, Stronger Promise
