Can blind flanges be reused after maintenance?
The reusability of blind flanges after upkeep operations speaks to a noteworthy financial thought for mechanical offices overseeing broad channeling systems. Understanding when dazzle spines can securely return to benefit and when substitution gets to be fundamental requires cautious assessment of different variables counting fabric condition, benefit history, assessment discoveries, and pertinent code necessities. Daze ribs ordinarily withstand numerous establishment and expulsion cycles given they stay free from harm, erosion, or dimensional changes that might compromise fixing execution. In any case, each reuse choice requests efficient assessment conventions confirming that basic measurements, fixing surfaces, and basic keenness meet worthy guidelines for proceeded benefit. Variables impacting reusability incorporate the seriousness of past benefit conditions, recurrence of warm cycling, presentation to destructive situations, and the number of past establishment cycles. This comprehensive investigation analyzes assessment criteria, restoration alternatives, and decision-making systems that empower office supervisors to maximize component esteem whereas keeping up security and unwavering quality standards.
Inspection Criteria for Determining Blind Flange Reusability
Visual Examination of Sealing Surfaces and Structural Integrity
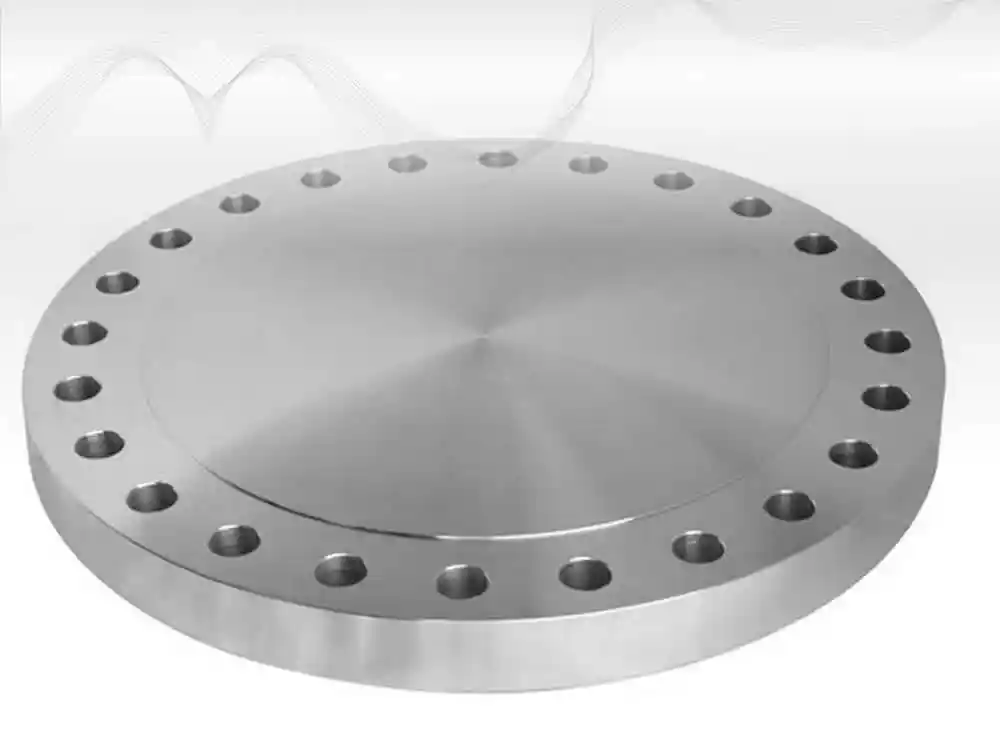
Visual inspection represents the essential first step in evaluating whether blind flanges remain suitable for continued service. Inspectors must carefully examine the raised face or ring-type joint sealing surface for scratches, gouges, pitting, or corrosion that could create leak paths when reinstalled with fresh gasket material. Minor surface imperfections measuring less than 0.25 millimeters in depth typically prove acceptable, while deeper defects may require machining or component replacement. The bolt holes require inspection for elongation, thread damage, or cracking that could prevent proper bolt engagement. Blind flanges exhibiting visible deformation including warping, bending, or distortion around bolt holes should be rejected, as these geometric changes prevent uniform gasket compression. Corrosion patterns deserve particular attention, with general surface oxidation being relatively benign while localized pitting may indicate underlying material degradation. Inspectors should verify that identification markings including material grade and pressure class remain legible, ensuring proper documentation and preventing inadvertent installation of incorrect components.
Dimensional Verification and Flatness Measurements
Precise dimensional measurements confirm that blind flanges maintain critical specifications necessary for proper mating with companion flanges. Thickness measurements using ultrasonic gauges verify that corrosion has not reduced wall thickness below minimum acceptable values. The raised face height requires verification against original specifications, as excessive wear could prevent proper gasket compression. Bolt circle diameter measurements ensure that hole positions remain within tolerance. Flatness measurements across the sealing surface detect warping or distortion that would prevent uniform gasket contact. Industry standards typically specify maximum flatness deviations ranging from 0.1 to 0.3 millimeters depending on flange size and pressure class, with blind flanges exceeding these limits requiring machining or replacement. Dimensional verification becomes particularly critical for blind flanges that have experienced high-temperature service, as thermal cycling can induce permanent deformation. Documentation of all measurements creates baseline data supporting future reuse decisions.
Non-Destructive Testing for Hidden Defects
Non-destructive examination procedures give understanding into inside fabric conditions that visual assessment cannot identify. Attractive molecule review uncovers surface-breaking and subsurface discontinuities in ferromagnetic daze ribs, identifying breaks or considerations that might start disappointment. Fluid penetrant testing serves comparative purposes for non-magnetic stainless steel or nickel amalgam daze ribs. Ultrasonic testing identifies inner laminations or porosity inside the dazzle spine fabric. Hardness testing confirms that fabric properties stay inside indicated ranges, with over the top hardness possibly showing microstructural changes that diminish durability. The degree of non-destructive testing ought to connect with benefit criticality, with harmful or combustible administrations justifying more comprehensive examination than kind applications.
Refurbishment and Reconditioning Options for Blind Flanges
Sealing Surface Machining and Restoration
Blind ribs with minor fixing surface absconds regularly advantage from machining operations that reestablish appropriate wrap up and levelness characteristics. Confronting operations utilizing exactness machine devices evacuate harmed fabric layers, making new fixing surfaces with fitting wrap up characteristics counting concentric or winding serrations. The machining profundity must protect satisfactory remaining thickness to keep up basic keenness and weight rating. Surface wrap up determinations regularly require harshness values between 125 and 250 microinches for raised confront arrangements. Machining gear must keep up exact dimensional control, guaranteeing the fixing surface remains opposite to jolt gaps. A few daze ribs with broad harm may not warrant machining if fabric expulsion would decrease thickness underneath least values or if machining costs approach unused component costs. Taking after machining, exhaustive cleaning evacuates cutting oils and flotsam and jetsam that might meddled with legitimate sealing.
Bolt Hole Repair and Thread Restoration
Blind flange bolt holes occasionally sustain damage including thread stripping, hole elongation, or localized cracking requiring repair before components can safely return to service. Minor thread damage sometimes responds to thread chasing operations using properly sized taps that restore thread profiles without significant material removal. More extensive thread damage may necessitate drilling and retapping to the next standard size, though this requires confirming adequate material remains around enlarged holes. Weld repair of bolt holes represents another option for valuable blind flanges, involving welding fill material into damaged areas followed by drilling and tapping to original specifications. This repair method demands qualified welding procedures and verification through non-destructive testing. Hole elongation resulting from repeated installations typically cannot be repaired, as the distorted geometry indicates the blind flange has reached its service life limit.
Coating Renewal and Corrosion Protection
External coatings on blind flanges deteriorate through mechanical damage and environmental exposure, requiring periodic renewal to maintain corrosion protection. Surface preparation involves cleaning, abrasive blasting to achieve specified surface profiles, and thorough drying before coating application. Coating selection should match or exceed original finish performance characteristics, with options including epoxy systems for general corrosion protection and zinc-rich primers for enhanced galvanic protection. Application techniques must achieve specified dry film thickness while avoiding defects. Special attention to sealing surfaces ensures coating materials do not contaminate areas requiring direct metal-to-gasket contact. Quality control measures including dry film thickness measurement verify that coating systems meet specification requirements.
Decision Framework and Best Practices for Blind Flange Reuse
Service History Documentation and Tracking Systems
Comprehensive service history documentation enables informed reuse decisions by providing essential context regarding previous operating conditions and accumulated damage. Tracking systems should record original installation dates, material certifications, pressure class ratings, and dimensional specifications. Each removal and reinstallation cycle warrants documentation including inspection findings, any refurbishment performed, gasket types used, and bolt torque values applied. Service condition information including operating pressures, temperatures, and fluid characteristics helps assess cumulative degradation effects on blind flange materials. Trending analysis of inspection data across multiple service cycles reveals degradation patterns, enabling predictive decisions about remaining service life. Some organizations establish maximum cycle limits for blind flanges in critical services, automatically retiring components after predetermined numbers of installations.
Risk-Based Evaluation Considering Service Criticality
Risk assessment methodologies provide structured approaches for reuse decisions that balance economic considerations against safety requirements. High-consequence systems handling toxic or flammable materials warrant conservative reuse criteria with more stringent inspection requirements compared to benign services. Pressure and temperature severity factors into risk evaluation, with high-pressure blind flanges receiving closer scrutiny than components in mild conditions. Accessibility considerations influence decisions, as blind flanges in difficult-to-reach locations justify more conservative replacement policies. Economic analysis comparing inspection costs, refurbishment expenses, and new component prices against failure consequences guides cost-effective decisions. Some facilities establish tiered reuse categories with varying inspection requirements based on application criticality.
Establishing Retirement Criteria and Replacement Thresholds
Clear retirement criteria avoid proceeded utilize of daze ribs that no longer meet satisfactory security benchmarks. Least thickness necessities based on weight rating calculations characterize retirement focuses where erosion has diminished auxiliary ampleness. Greatest passable fixing surface deformity profundities past which machining cannot reestablish satisfactory wrap up characteristics trigger substitution choices. Dimensional resilience limits for levelness and jolt gap situating build up boundaries exterior which dazzle ribs cannot accomplish dependable fixing. Benefit cycle limits for high-fatigue or high-temperature applications recognize that aggregate harm happens indeed when assessments uncover no clear surrenders. Organizations ought to intermittently audit and overhaul retirement criteria based on working involvement, consolidating lessons learned from disappointments into moved forward choice frameworks.
Conclusion
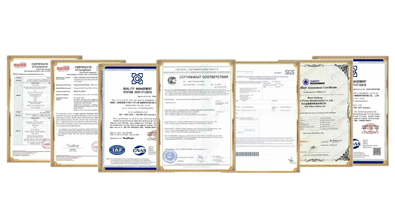
Blind ribs can frequently be securely reused after support when efficient assessment affirms satisfactory condition and benefit history underpins proceeded unwavering quality. Appropriate assessment considering fixing surface keenness, dimensional precision, and fabric properties empowers cost-effective reuse whereas keeping up security benchmarks. At HEBEI RAYOUNG PIPELINE Innovation CO., LTD., we supply premium daze ribs outlined for expanded benefit life and different reuse cycles. Our items meet universal measures with ISO 9001:2015 certification, GOST-R and SGS approval, supporting applications from private buildings to mechanical plants with reliable quality and long-term durability.
FAQ
1. How many times can a blind flange typically be reused?
The reusability of blind flanges depends on service conditions, material quality, and maintenance practices rather than a fixed cycle limit. Blind flanges in mild, non-corrosive services with proper installation procedures often withstand ten or more cycles. Severe services involving high temperatures or corrosive environments may limit reuse to three to five cycles. Each installation requires thorough inspection to verify continued suitability regardless of previous cycle count.
2. Do I need to replace gaskets every time I reuse blind flanges?
Yes, gasket replacement is mandatory for each blind flange installation regardless of the component's reusability. Compressed gaskets lose resilience and sealing capability after initial use, making reuse unreliable even if gaskets appear undamaged. The cost of new gaskets represents minimal expense compared to potential leak consequences. Proper gasket selection based on service conditions ensures optimal sealing performance with reused blind flanges.
3. What inspection methods are required before reusing blind flanges?
Minimum inspection requirements include visual examination of sealing surfaces and bolt holes, dimensional verification of critical features, and assessment of corrosion or damage. Critical applications may require enhanced inspection including magnetic particle or liquid penetrant testing for crack detection, ultrasonic thickness measurement to verify adequate remaining material, and hardness testing to confirm acceptable material properties. Inspection scope should align with service severity and consequence of failure.
4. Can blind flanges with minor surface damage be machined and reused?
Minor sealing surface defects often respond successfully to machining operations that restore proper finish and flatness characteristics. Machining feasibility depends on damage depth, remaining thickness after material removal, and cost-effectiveness compared to replacement. Facilities with machine shop capabilities may find reconditioning economical for expensive large-diameter or exotic alloy blind flanges. Engineering calculations must verify that machining maintains adequate structural thickness for the specified pressure rating.
Premium Blind Flanges from HEBEI RAYOUNG PIPELINE: Leading Manufacturers for Extended Service Life
At HEBEI RAYOUNG PIPELINE TECHNOLOGY CO., LTD., we believe that excellent infrastructure starts with dependable materials, and our blind flanges exemplify superior quality designed for extended service life and multiple reuse cycles. As one of the leading pipes and fittings manufacturers, we supply high-quality blind flanges in carbon steel, stainless steel, and alloy materials that stand the test of time. Our product lineup includes comprehensive size ranges in pressure classes from 150 to 2500, ensuring secure connection points for all design requirements. RAYOUNG is known across industries as a dependable supplier, consistently serving domestic and global markets with GOST-R and SGS certifications for export compliance. We understand the importance of consistent quality, ISO 9001:2015 certification, and innovation in every application, delivering blind flanges with superior dimensional accuracy and documented material properties that support confident reuse decisions. Our steel pipe fittings deliver performance, safety capabilities, and long-term durability for projects from residential homes to industrial plants, supporting essential flow systems precisely. Contact us today at info@hb-steel.com to discover how RAYOUNG's commitment to quality enables cost-effective component reuse while maintaining the highest safety standards your applications demand.
References
1. American Society of Mechanical Engineers. (2020). ASME PCC-1: Guidelines for Pressure Boundary Bolted Flange Joint Assembly. New York: ASME Press.
2. American Petroleum Institute. (2019). API 570: Piping Inspection Code: In-Service Inspection, Rating, Repair, and Alteration of Piping Systems. Washington: API Publishing Services.
3. Singh, R. K. (2021). Pipeline Integrity Management Systems: A Practical Approach. Houston: Gulf Professional Publishing.
4. Becht, C. (2018). Process Piping Design Handbook Volume Two: Advanced Piping Design. Houston: Becht Engineering Company.
5. European Committee for Standardization. (2019). EN 1591-1: Flanges and Their Joints - Design Rules for Gasketed Circular Flange Connections. Brussels: CEN Publications.
6. American Society for Nondestructive Testing. (2017). Nondestructive Testing Handbook, Fourth Edition: Visual and Optical Testing. Columbus: ASNT Publications.

Need a quote? Want to see samples? Just say hello. We’re friendly. We’re fast. And we’re ready when you are.
Welcome to RAYOUNG – Strong Pipes, Stronger Promise
